How to upgrade your computer with faster CPU?
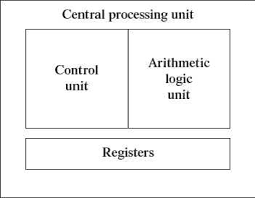
If your computer seems sluggish lately, it may need a faster CPU or more memory.In this article, I will show you how to do this upgrade!Before you begin you will need to configure your motherboard to work with your CPU full form in computer also known as central processor unit and memory modules.Use small black plastic jumpers and a memory module associated with the type and speed of the CPU (Central Processor Unit), referring to your motherboard owner's guide.
Some new motherboards are jumper less. This board can be configured later in the SETUP or BIOS program.Remove and replace the jumpers according to your motherboard owner's guidelines. If you are replacing your current central processor unit, you must first remove your old one with What is the full form of CPU?
The CPU on the ATX Slot 1 system is a large module that will stay on the motherboard. Carefully push the CPU latch inside before pulling the CPU up and out, then unplug the CPU fan connector.Find the cpu full formon the AT type board. The CPU is a large square chip with a propeller on top.It will have a release handle on the socket, pull up the handle and release the CPU which will let you take it out. Unplug the fan and heat the sink so you can reuse them with the new CPU.
You can now proceed to install the new CPU. I will start with the instructions for the first ATX type slot 1 system. On ATX systems you will need to install a retention mechanism, also known as CPU mounting support, that usually comes with your motherboard or CPU. If you have not been provided with this method, you will need to purchase a separate one before continuing. Install the pegs in the motherboard.
Some ATX Slot 1 processors come with heatsink and fan pre-installed, if you don't have one you have to buy a separate one and snap it on the CPU. Slide the heatsink support to each end of the heatsink. Push the CPU latch inwards and slowly slide the CPU into the mounting support, making sure the heatsink support holes are aligned with the pegs. Slide the clips until they snap with the pegs and then pull out the slide latch. Plug the CPU fan wire into the CPU fan marked in the motherboard connector.
Find the large white socket on the motherboard on the AT type system. Make sure the release handle on the socket is in the up position. Mount the heatsink and fan on the CPU by snaping a plastic clip onto the CPU chip. Turn the CPU sideways, pin up. Orient the pin layout to match the socket. Gently place the CPU above the socket and press down. Press down the release handle to lock it.
You can now proceed to install the memory module. Memory modules are small circuit boards that have integrated circuit memory chips. Check your motherboard owner's manual to see what type is required for your particular system.
Find the memory socket on your motherboard. If you are upgrading your current system, you may need to remove some expansion cards to gain access. There will be 2 to 4 sockets depending on your specific motherboard.
Check if there are clamps on the socket to remove the old module, if so pull them gently to release the module. Tilt the module toward the clamp and pull it gently.Never push the module. If there are no clamps on the socket, use 2 non-magnetic flathead screwdrivers, one to loosen it and the other to loosen it lightly. Turn one side oose at a time.


Comments
Post a Comment